GitLab Documentation guidelines
GitLab's documentation is intended as the single source of truth (SSOT) for information about how to configure, use, and troubleshoot GitLab. The documentation contains use cases and usage instructions for every GitLab feature, organized by product area and subject. This includes topics and workflows that span multiple GitLab features, and the use of GitLab with other applications.
In addition to this page, the following resources can help you craft and contribute to documentation:
- Style Guide - What belongs in the docs, language guidelines, Markdown standards to follow, links, and more.
- Structure and template - Learn the typical parts of a doc page and how to write each one.
- Documentation process.
- Markdown Guide - A reference for all Markdown syntax supported by GitLab.
- Site architecture - How https://docs.gitlab.com is built.
- Documentation for feature flags - How to write and update documentation for GitLab features deployed behind feature flags.
Source files and rendered web locations
Documentation for GitLab, GitLab Runner, Omnibus GitLab, and Charts is published to https://docs.gitlab.com. Documentation for GitLab is also published within the application at /help on the domain of the GitLab instance.
At /help, only help for your current edition and version is included. Help for other versions is available at https://docs.gitlab.com/archives/.
The source of the documentation exists within the codebase of each GitLab application in the following repository locations:
| Project | Path |
|---|---|
| GitLab | /doc |
| GitLab Runner | /docs |
| Omnibus GitLab | /doc |
| Charts | /doc |
Documentation issues and merge requests are part of their respective repositories and all have the label Documentation.
Branch naming
The CI pipeline for the main GitLab project is configured to automatically run only the jobs that match the type of contribution. If your contribution contains only documentation changes, then only documentation-related jobs will be run, and the pipeline will complete much faster than a code contribution.
If you are submitting documentation-only changes to Runner, Omnibus, or Charts, the fast pipeline is not determined automatically. Instead, create branches for docs-only merge requests using the following guide:
| Branch name | Valid example |
|---|---|
Starting with docs/
|
docs/update-api-issues |
Starting with docs-
|
docs-update-api-issues |
Ending in -docs
|
123-update-api-issues-docs |
Contributing to docs
Contributions to GitLab docs are welcome from the entire GitLab community.
To ensure that GitLab docs are current, there are special processes and responsibilities for all feature changes, that is development work that impacts the appearance, usage, or administration of a feature.
However, anyone can contribute documentation improvements that are not associated with a feature change. For example, adding a new doc on how to accomplish a use case that's already possible with GitLab or with third-party tools and GitLab.
Markdown and styles
GitLab docs uses GitLab Kramdown as its Markdown rendering engine. See the GitLab Markdown Guide for a complete Kramdown reference.
Adhere to the Documentation Style Guide. If a style standard is missing, you are welcome to suggest one via a merge request.
Folder structure and files
See the Structure section of the Documentation Style Guide.
Metadata
To provide additional directives or useful information, we add metadata in YAML format to the beginning of each product documentation page (YAML front matter). All values are treated as strings and are only used for the docs website.
Stage and group metadata
Each page should ideally have metadata related to the stage and group it belongs to, as well as an information block as described below:
-
stage: The Stage to which the majority of the page's content belongs. -
group: The Group to which the majority of the page's content belongs. -
info: The following line, which provides direction to contributors regarding how to contact the Technical Writer associated with the page's Stage and Group:To determine the technical writer assigned to the Stage/Group associated with this page, see https://about.gitlab.com/handbook/engineering/ux/technical-writing/#designated-technical-writers
For example, the following metadata would be at the beginning of a product documentation page whose content is primarily associated with the Audit Events feature:
---
stage: Monitor
group: APM
info: To determine the technical writer assigned to the Stage/Group associated with this page, see https://about.gitlab.com/handbook/engineering/ux/technical-writing/#designated-technical-writers
---
Document type metadata
Originally discussed in this epic,
each page should have a metadata tag called type. It can be one or more of the
following:
-
index: It consists mostly of a list of links to other pages. Example page. -
concepts: The background or context of a subject. Example page. -
howto: Specific use case instructions. Example page. -
tutorial: Learn a process/concept by doing. Example page. -
reference: A collection of information used as a reference to use a feature or a functionality. Example page.
Redirection metadata
The following metadata should be added when a page is moved to another location:
-
redirect_to: The relative path and filename (with an.mdextension) of the location to which visitors should be redirected for a moved page. Learn more. -
disqus_identifier: Identifier for Disqus commenting system. Used to keep comments with a page that's been moved to a new URL. Learn more.
Comments metadata
The docs website has comments (provided by Disqus)
enabled by default. In case you want to disable them (for example in index pages),
set it to false:
---
comments: false
---
Additional page metadata
Each page can have additional, optional metadata (set in the default.html Nanoc layout), which will be displayed at the top of the page if defined:
-
reading_time: If you want to add an indication of the approximate reading time of a page, you can setreading_timetotrue. This uses a simple algorithm to calculate the reading time based on the number of words.
Changing document location
Changing a document's location requires specific steps to ensure that
users can seamlessly access the new doc page, whether they are accessing content
on a GitLab instance domain at /help or at https://docs.gitlab.com. Be sure to assign a
technical writer if you have any questions during the process (such as
whether the move is necessary), and ensure that a technical writer reviews this
change prior to merging.
If you indeed need to change a document's location, do not remove the old document, but instead replace all of its content with the following:
---
redirect_to: '../path/to/file/index.md'
---

This document was moved to [another location](../path/to/file/index.md).
Where ../path/to/file/index.md is usually the relative path to the old document.
The redirect_to variable supports both full and relative URLs, for example
https://docs.gitlab.com/ee/path/to/file.html, ../path/to/file.html, path/to/file.md.
It ensures that the redirect will work for https://docs.gitlab.com and any *.md paths
will be compiled to *.html.
The new line underneath the front matter informs the user that the document
changed location and is useful for someone that browses that file from the repository.
For example, if you move doc/workflow/lfs/index.md to
doc/administration/lfs.md, then the steps would be:
-
Copy
doc/workflow/lfs/index.mdtodoc/administration/lfs.md -
Replace the contents of
doc/workflow/lfs/index.mdwith:--- redirect_to: '../../administration/lfs.md' --- This document was moved to [another location](../../administration/lfs.md). -
Find and replace any occurrences of the old location with the new one. A quick way to find them is to use
git grepon the repository you changed the file from:git grep -n "workflow/lfs/lfs_administration" git grep -n "lfs/lfs_administration"
NOTE: Note: If the document being moved has any Disqus comments on it, there are extra steps to follow documented just below.
Things to note:
- Since we also use inline documentation, except for the documentation itself,
the document might also be referenced in the views of GitLab (
app/) which will render when visiting/help, and sometimes in the testing suite (spec/). You must search these paths for references to the doc and update them as well. - The above
git grepcommand will search recursively in the directory you run it in forworkflow/lfs/lfs_administrationandlfs/lfs_administrationand will print the file and the line where this file is mentioned. You may ask why the two greps. Since we use relative paths to link to documentation, sometimes it might be useful to search a path deeper. - The
*.mdextension is not used when a document is linked to GitLab's built-in help page, which is why we omit it ingit grep. - Use the checklist on the "Change documentation location" MR description template.
Redirections for pages with Disqus comments
If the documentation page being relocated already has Disqus comments, we need to preserve the Disqus thread.
Disqus uses an identifier per page, and for https://docs.gitlab.com, the page identifier is configured to be the page URL. Therefore, when we change the document location, we need to preserve the old URL as the same Disqus identifier.
To do that, add to the front matter the variable disqus_identifier,
using the old URL as value. For example, let's say we moved the document
available under https://docs.gitlab.com/my-old-location/README.html to a new location,
https://docs.gitlab.com/my-new-location/index.html.
Into the new document front matter, we add the following:
---
disqus_identifier: 'https://docs.gitlab.com/my-old-location/README.html'
---
Note: it is necessary to include the file name in the disqus_identifier URL,
even if it's index.html or README.html.
Merge requests for GitLab documentation
Before getting started, make sure you read the introductory section "contributing to docs" above and the documentation workflow.
- Use the current merge request description template
- Label the MR
Documentation(can only be done by people withdeveloperaccess, for example, GitLab team members) - Assign the correct milestone per note below (can only be done by people with
developeraccess, for example, GitLab team members)
Documentation will be merged if it is an improvement on existing content, represents a good-faith effort to follow the template and style standards, and is believed to be accurate.
Further needs for what would make the doc even better should be immediately addressed in a follow-up MR or issue.
NOTE: Note:
If the release version you want to add the documentation to has already been
frozen or released, use the label ~"Pick into X.Y" to get it merged into
the correct release. Avoid picking into a past release as much as you can, as
it increases the work of the release managers.
GitLab /help
Every GitLab instance includes the documentation, which is available at /help
(https://gitlab.example.com/help). For example, https://gitlab.com/help.
The documentation available online on https://docs.gitlab.com is deployed every four hours from the master branch of GitLab, Omnibus, and Runner. Therefore,
after a merge request gets merged, it will be available online on the same day.
However, it will be shipped (and available on /help) within the milestone assigned
to the MR.
For example, let's say your merge request has a milestone set to 11.3, which
will be released on 2018-09-22. If it gets merged on 2018-09-15, it will be
available online on 2018-09-15, but, as the feature freeze date has passed, if
the MR does not have a ~"Pick into 11.3" label, the milestone has to be changed
to 11.4 and it will be shipped with all GitLab packages only on 2018-10-22,
with GitLab 11.4. Meaning, it will only be available under /help from GitLab
11.4 onward, but available on https://docs.gitlab.com/ on the same day it was merged.
Linking to /help
When you're building a new feature, you may need to link the documentation
from GitLab, the application. This is normally done in files inside the
app/views/ directory with the help of the help_page_path helper method.
In its simplest form, the HAML code to generate a link to the /help page is:
= link_to 'Help page', help_page_path('user/permissions')The help_page_path contains the path to the document you want to link to with
the following conventions:
- it is relative to the
doc/directory in the GitLab repository - the
.mdextension must be omitted - it must not end with a slash (
/)
Below are some special cases where should be used depending on the context. You can combine one or more of the following:
-
Linking to an anchor link. Use
anchoras part of thehelp_page_pathmethod:= link_to 'Help page', help_page_path('user/permissions', anchor: 'anchor-link') -
Opening links in a new tab. This should be the default behavior:
= link_to 'Help page', help_page_path('user/permissions'), target: '_blank' -
Using a question icon. Usually used in settings where a long description cannot be used, like near checkboxes. You can basically use any GitLab SVG icon, but prefer the
question-o:= link_to sprite_icon('question-o'), help_page_path('user/permissions') -
Using a button link. Useful in places where text would be out of context with the rest of the page layout:
= link_to 'Help page', help_page_path('user/permissions'), class: 'btn btn-info' -
Using links inline of some text.
Description to #{link_to 'Help page', help_page_path('user/permissions')}. -
Adding a period at the end of the sentence. Useful when you don't want the period to be part of the link:
= succeed '.' do
  Learn more in the
  = link_to 'Help page', help_page_path('user/permissions')
GitLab /help tests
Several RSpec tests
are run to ensure GitLab documentation renders and works correctly. In particular, that main docs landing page will work correctly from /help.
For example, GitLab.com's /help.
Docs site architecture
See the Docs site architecture page to learn how we build and deploy the site at https://docs.gitlab.com and to review all the assets and libraries in use.
Global navigation
See the Global navigation doc for information on how the left-side navigation menu is built and updated.
Previewing the changes live
NOTE: Note: To preview your changes to documentation locally, follow this development guide or these instructions for GDK.
The live preview is currently enabled for the following projects:
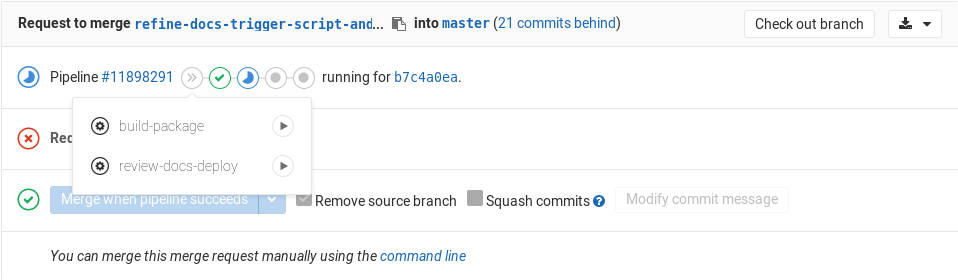
If your merge request has docs changes, you can use the manual review-docs-deploy job
to deploy the docs review app for your merge request.
You will need at least Maintainer permissions to be able to run it.
NOTE: Note: You will need to push a branch to those repositories, it doesn't work for forks.
The review-docs-deploy* job will:
- Create a new branch in the
gitlab-docsproject named after the scheme:docs-preview-$DOCS_GITLAB_REPO_SUFFIX-$CI_MERGE_REQUEST_IID, whereDOCS_GITLAB_REPO_SUFFIXis the suffix for each product, e.g,eefor EE,omnibusfor Omnibus GitLab, etc, andCI_MERGE_REQUEST_IIDis the ID of the respective merge request. - Trigger a cross project pipeline and build the docs site with your changes.
In case the review app URL returns 404, this means that either the site is not
yet deployed, or something went wrong with the remote pipeline. Give it a few
minutes and it should appear online, otherwise you can check the status of the
remote pipeline from the link in the merge request's job output.
If the pipeline failed or got stuck, drop a line in the #docs chat channel.
TIP: Tip: Someone with no merge rights to the GitLab projects (think of forks from contributors) cannot run the manual job. In that case, you can ask someone from the GitLab team who has the permissions to do that for you.
NOTE: Note: Make sure that you always delete the branch of the merge request you were working on. If you don't, the remote docs branch won't be removed either, and the server where the Review Apps are hosted will eventually be out of disk space.
Troubleshooting review apps
In case the review app URL returns 404, follow these steps to debug:
- Did you follow the URL from the merge request widget? If yes, then check if the link is the same as the one in the job output.
-
Did you follow the URL from the job output? If yes, then it means that
either the site is not yet deployed or something went wrong with the remote
pipeline. Give it a few minutes and it should appear online, otherwise you
can check the status of the remote pipeline from the link in the job output.
If the pipeline failed or got stuck, drop a line in the
#docschat channel.
Technical aspects
If you want to know the in-depth details, here's what's really happening:
- You manually run the
review-docs-deployjob in a merge request. - The job runs the
scripts/trigger-buildscript with thedocs deployflag, which in turn:- Takes your branch name and applies the following:
- The
docs-preview-prefix is added. - The product slug is used to know the project the review app originated from.
- The number of the merge request is added so that you can know by the
gitlab-docsbranch name the merge request it originated from.
- The
- The remote branch is then created if it doesn't exist (meaning you can re-run the manual job as many times as you want and this step will be skipped).
- A new cross-project pipeline is triggered in the docs project.
- The preview URL is shown both at the job output and in the merge request widget. You also get the link to the remote pipeline.
- Takes your branch name and applies the following:
- In the docs project, the pipeline is created and it skips the test jobs to lower the build time.
- Once the docs site is built, the HTML files are uploaded as artifacts.
- A specific runner tied only to the docs project, runs the Review App job
that downloads the artifacts and uses
rsyncto transfer the files over to a location where NGINX serves them.
The following GitLab features are used among others:
- Manual actions
- Multi project pipelines
- Review Apps
- Artifacts
- Specific runner
- Pipelines for merge requests
Testing
We treat documentation as code, and so use tests in our CI pipeline to maintain the standards and quality of the docs. The current tests, which run in CI jobs when a merge request with new or changed docs is submitted, are:
-
docs lint: Runs several tests on the content of the docs themselves:-
lint-doc.shscript runs the following checks and linters:- All cURL examples use the long flags (ex:
--header, not-H). - The
CHANGELOG.mddoes not contain duplicate versions. - No files in
doc/are executable. - No new
README.mdwas added. - markdownlint.
- Vale.
- All cURL examples use the long flags (ex:
- Nanoc tests:
-
internal_linkschecks that all internal links (ex:[link](../index.md)) are valid. -
internal_anchorschecks that all internal anchors (ex:[link](../index.md#internal_anchor)) are valid.
-
-
ui-docs-links lintchecks that all links to docs from UI elements (app/viewsfiles, for example) are linking to valid docs and anchors.
-
Run tests locally
Apart from previewing your changes locally, you can also run all lint checks and Nanoc tests locally.
Lint checks
Lint checks are performed by the lint-doc.sh
script and can be executed as follows:
-
Navigate to the
gitlabdirectory. -
Run:
MD_DOC_PATH=path/to/my_doc.md scripts/lint-doc.sh
Where MD_DOC_PATH points to the file or directory you would like to run lint checks for.
If you omit it completely, it will default to the doc/ directory.
The output should be similar to:
=> Linting documents at path /path/to/gitlab as <user>...
=> Checking for cURL short options...
=> Checking for CHANGELOG.md duplicate entries...
=> Checking /path/to/gitlab/doc for executable permissions...
=> Checking for new README.md files...
=> Linting markdown style...
=> Linting prose...
✔ 0 errors, 0 warnings and 0 suggestions in 1 file.
✔ Linting passed
Note that this requires you to either have the required lint tools installed on your machine, or a working Docker installation, in which case an image with these tools pre-installed will be used.
Nanoc tests
To execute Nanoc tests locally:
-
Navigate to the
gitlab-docsdirectory. -
Run:
# Check for broken internal links
bundle exec nanoc check internal_links

# Check for broken external links (might take a lot of time to complete).
# This test is set to be allowed to fail and is run only in the gitlab-docs project CI
bundle exec nanoc check internal_anchors
ui-docs-links test
The ui-docs-links lint job uses haml-lint to test that all links to docs from
UI elements (app/views files, for example) are linking to valid docs and anchors.
To run the ui-docs-links test locally:
-
Open the
gitlabdirectory in a terminal window. -
Run:
bundle exec haml-lint -i DocumentationLinks
If you receive an error the first time you run this test, run bundle install, which
installs GitLab's dependencies, and try again.
If you don't want to install all of GitLab's dependencies to test the links, you can:
-
Open the
gitlabdirectory in a terminal window. -
Install
haml-lint:gem install haml_lint -
Run:
haml-lint -i DocumentationLinks
If you manually install haml-lint with this process, it will not update automatically
and you should make sure your version matches the version used by GitLab.
Local linters
To help adhere to the documentation style guidelines, and improve the content added to documentation, install documentation linters and integrate them with your code editor.
At GitLab, we mostly use:
markdownlint
markdownlint checks that Markdown syntax follows
certain rules, and is
used by the docs-lint test.
Our Documentation Style Guide and Markdown Guide elaborate on which choices must be made when selecting Markdown syntax for GitLab documentation. This tool helps catch deviations from those guidelines.
markdownlint configuration is found in the following projects:
This configuration is also used within build pipelines.
You can use markdownlint:
Vale
Vale is a grammar, style, and word usage linter for the
English language. Vale's configuration is stored in the
.vale.ini file located in the root
directory of projects.
Vale supports creating custom tests that extend any of
several types of checks, which we store in the .linting/vale/styles/gitlab directory within the
documentation directory of projects.
Vale configuration is found in the following projects:
This configuration is also used within build pipelines.
You can use Vale:
- On the command line.
- Within a code editor.
-
In a
pre-commithook. Vale only reports errors in thepre-commithook (the same configuration as the CI/CD pipelines), and does not report suggestions or warnings.
Install linters
At a minimum, install markdownlint and Vale to match the checks run in build pipelines:
-
Install
markdownlint-cli, using either:-
npm:npm install -g markdownlint-cli -
yarn:yarn global add markdownlint-cliWe recommend installing the version of
markdownlint-clicurrently used in the documentation linting Docker image.
-
-
Install
vale. For example, to install usingbrewfor macOS, run:brew install valeWe recommend installing the version of Vale currently used in the documentation linting Docker image.
In addition to using markdownlint and Vale at the command line, these tools can be integrated with your code editor.
Configure editors
To configure markdownlint within your editor, install one of the following as appropriate:
To configure Vale within your editor, install one of the following as appropriate:
- The Sublime Text
SublimeLinter-contrib-valeplugin. - The Visual Studio Code
errata-ai.vale-serverextension. You don't need Vale Server to use the plugin. - Vim.
We don't use Vale Server.
Configure pre-commit hooks
Git pre-commit hooks allow Git users to run tests or other processes before committing to a branch, with the ability to not commit to the branch if failures occur with these tests.
overcommit is a Git hooks manager, making configuring,
installing, and removing Git hooks easy.
Sample configuration for overcommit is available in the
.overcommit.yml.example
file for the gitlab project.
To set up overcommit for documentation linting, see
Pre-commit static analysis.
Disable Vale tests
You can disable a specific Vale linting rule or all Vale linting rules for any portion of a document:
- To disable a specific rule, add a
<!-- vale gitlab.rulename = NO -->tag before the text, and a<!-- vale gitlab.rulename = YES -->tag after the text, replacingrulenamewith the filename of a test in the GitLab styles directory. - To disable all Vale linting rules, add a
<!-- vale off -->tag before the text, and a<!-- vale on -->tag after the text.
Whenever possible, exclude only the problematic rule and line(s).
For more information, see Vale's documentation.
Danger Bot
GitLab uses Danger for some elements in
code review. For docs changes in merge requests, whenever a change to files under /doc
is made, Danger Bot leaves a comment with further instructions about the documentation
process. This is configured in the Dangerfile in the GitLab repository under
/danger/documentation/.
Automatic screenshot generator
You can now set up an automatic screenshot generator to take and compress screenshots, with the help of a configuration file known as screenshot generator.
Use the tool
To run the tool on an existing screenshot generator, take the following steps:
- Set up the GitLab Development Kit (GDK).
- Navigate to the subdirectory with your cloned GitLab repository, typically
gdk/gitlab. - Make sure that your GDK database is fully migrated:
bin/rake db:migrate RAILS_ENV=development. - Install pngquant, see the tool website for more info:
pngquant - Run
scripts/docs_screenshots.rb spec/docs_screenshots/<name_of_screenshot_generator>.rb <milestone-version>. - Identify the location of the screenshots, based on the
gitlab/doclocation defined by theitparameter in your script. - Commit the newly created screenshots.
Extending the tool
To add an additional screenshot generator, take the following steps:
- Locate the
spec/docs_screenshotsdirectory. - Add a new file with a
_docs.rbextension. - Be sure to include the following bits in the file:
require 'spec_helper'

RSpec.describe '<What I am taking screenshots of>', :js do
  include DocsScreenshotHelpers # Helper that enables the screenshots taking mechanism

  before do
    page.driver.browser.manage.window.resize_to(1366, 1024) # length and width of the page
end- In addition, every
itblock must include the path where the screenshot is saved
it 'user/packages/container_registry/img/project_image_repositories_list'Full page screenshots
To take a full page screenshot simply visit the page and perform any expectation on real content (to have capybara wait till the page is ready and not take a white screenshot).
Element screenshot
To have the screenshot focuses few more steps are needed:
-
find the area:
screenshot_area = find('#js-registry-policies') -
scroll the area in focus:
scroll_to screenshot_area -
wait for the content:
expect(screenshot_area).to have_content 'Expiration interval' -
set the crop area:
set_crop_data(screenshot_area, 20)
In particular set_crop_data accepts as arguments: a DOM element and a padding, the padding will be added around the element enlarging the screenshot area.
Live example
Please use spec/docs_screenshots/container_registry_docs.rb as a guide and as an example to create your own scripts.