Infrastructure as code with Terraform and GitLab
Motivation
The Terraform integration features within GitLab enable your GitOps / Infrastructure-as-Code (IaC) workflows to tie into GitLab's authentication and authorization. These features focus on lowering the barrier to entry for teams to adopt Terraform, collaborate effectively within GitLab, and support Terraform best practices.
GitLab managed Terraform State
Introduced in GitLab 13.0.
Terraform remote backends enable you to store the state file in a remote, shared store. GitLab uses the Terraform HTTP backend to securely store the state files in local storage (the default) or the remote store of your choice.
The GitLab managed Terraform state backend can store your Terraform state easily and securely, and spares you from setting up additional remote resources like Amazon S3 or Google Cloud Storage. Its features include:
- Supporting encryption of the state file both in transit and at rest.
- Locking and unlocking state.
- Remote Terraform plan and apply execution.
To get started with a GitLab-managed Terraform State, there are two different options:
Permissions for using Terraform
In GitLab version 13.1, Maintainer access was required to use a
GitLab managed Terraform state backend. In GitLab versions 13.2 and greater,
Maintainer access is required to lock, unlock and write to the state
(using terraform apply), while Developer access is required to read
the state (using terraform plan -lock=false).
Get started using local development
If you plan to only run terraform plan and terraform apply commands from your
local machine, this is a simple way to get started:
-
Create your project on your GitLab instance.
-
Navigate to Settings > General and note your Project name and Project ID.
-
Define the Terraform backend in your Terraform project to be:
terraform { backend "http" { } } -
Create a Personal Access Token with the
apiscope. -
On your local machine, run
terraform init, passing in the following options, replacing<YOUR-STATE-NAME>,<YOUR-PROJECT-ID>,<YOUR-USERNAME>and<YOUR-ACCESS-TOKEN>with the relevant values. This command initializes your Terraform state, and stores that state within your GitLab project. This example usesgitlab.com:terraform init \ -backend-config="address=https://gitlab.com/api/v4/projects/<YOUR-PROJECT-ID>/terraform/state/<YOUR-STATE-NAME>" \ -backend-config="lock_address=https://gitlab.com/api/v4/projects/<YOUR-PROJECT-ID>/terraform/state/<YOUR-STATE-NAME>/lock" \ -backend-config="unlock_address=https://gitlab.com/api/v4/projects/<YOUR-PROJECT-ID>/terraform/state/<YOUR-STATE-NAME>/lock" \ -backend-config="username=<YOUR-USERNAME>" \ -backend-config="password=<YOUR-ACCESS-TOKEN>" \ -backend-config="lock_method=POST" \ -backend-config="unlock_method=DELETE" \ -backend-config="retry_wait_min=5"
You can now run terraform plan and terraform apply as you normally would.
Get started using GitLab CI
If you don't want to start with local development, you can also use GitLab CI to
run your terraform plan and terraform apply commands.
Next, configure the backend.
Configure the backend
After executing the terraform init command, you must configure the Terraform backend
and the CI YAML file:
-
In your Terraform project, define the HTTP backend by adding the following code block in a
.tffile (such asbackend.tf) to define the remote backend:terraform { backend "http" { } } -
In the root directory of your project repository, configure a
.gitlab-ci.yamlfile. This example uses a pre-built image which includes agitlab-terraformhelper. For supported Terraform versions, see the GitLab Terraform Images project.image: registry.gitlab.com/gitlab-org/terraform-images/stable:latest -
In the
.gitlab-ci.yamlfile, define some environment variables to ease development. In this example,TF_ROOTis the directory where the Terraform commands must be executed,TF_ADDRESSis the URL to the state on the GitLab instance where this pipeline runs, and the final path segment inTF_ADDRESSis the name of the Terraform state. Projects may have multiple states, and this name is arbitrary, so in this example we set it toexample-productionwhich corresponds with the directory we're using as ourTF_ROOT, and we ensure that the.terraformdirectory is cached between jobs in the pipeline using a cache key based on the state name (example-production):variables: TF_ROOT: ${CI_PROJECT_DIR}/environments/example/production TF_ADDRESS: ${CI_API_V4_URL}/projects/${CI_PROJECT_ID}/terraform/state/example-production cache: key: example-production paths: - ${TF_ROOT}/.terraform -
In a
before_script, change to yourTF_ROOT:before_script: - cd ${TF_ROOT} stages: - prepare - validate - build - deploy init: stage: prepare script: - gitlab-terraform init validate: stage: validate script: - gitlab-terraform validate plan: stage: build script: - gitlab-terraform plan - gitlab-terraform plan-json artifacts: name: plan paths: - ${TF_ROOT}/plan.cache reports: terraform: ${TF_ROOT}/plan.json apply: stage: deploy environment: name: production script: - gitlab-terraform apply dependencies: - plan when: manual only: - master -
Push your project to GitLab, which triggers a CI job pipeline. This pipeline runs the
gitlab-terraform init,gitlab-terraform validate, andgitlab-terraform plancommands.
The output from the above terraform commands should be viewable in the job logs.
CAUTION: Caution: Like any other job artifact, Terraform plan data is viewable by anyone with Guest access to the repository. Neither Terraform nor GitLab encrypts the plan file by default. If your Terraform plan includes sensitive data such as passwords, access tokens, or certificates, GitLab strongly recommends encrypting plan output or modifying the project visibility settings.
Example project
See this reference project using GitLab and Terraform to deploy a basic AWS EC2 within a custom VPC.
Copy Terraform state between backends
Terraform supports copying the state when the backend is changed or reconfigured. This can be useful if you need to migrate from another backend to GitLab managed Terraform state. It's also useful if you need to change the state name as in the following example:
PROJECT_ID="<gitlab-project-id>"
TF_USERNAME="<gitlab-username>"
TF_PASSWORD="<gitlab-personal-access-token>"
TF_ADDRESS="https://gitlab.com/api/v4/projects/${PROJECT_ID}/terraform/state/old-state-name"
terraform init \
-backend-config=address=${TF_ADDRESS} \
-backend-config=lock_address=${TF_ADDRESS}/lock \
-backend-config=unlock_address=${TF_ADDRESS}/lock \
-backend-config=username=${TF_USERNAME} \
-backend-config=password=${TF_PASSWORD} \
-backend-config=lock_method=POST \
-backend-config=unlock_method=DELETE \
-backend-config=retry_wait_min=5Initializing the backend...
Successfully configured the backend "http"! Terraform will automatically
use this backend unless the backend configuration changes.
Initializing provider plugins...
Terraform has been successfully initialized!
You may now begin working with Terraform. Try running "terraform plan" to see
any changes that are required for your infrastructure. All Terraform commands
should now work.
If you ever set or change modules or backend configuration for Terraform,
rerun this command to reinitialize your working directory. If you forget, other
commands will detect it and remind you to do so if necessary.Now that terraform init has created a .terraform/ directory that knows where
the old state is, you can tell it about the new location:
TF_ADDRESS="https://gitlab.com/api/v4/projects/${PROJECT_ID}/terraform/state/new-state-name"
terraform init \
-backend-config=address=${TF_ADDRESS} \
-backend-config=lock_address=${TF_ADDRESS}/lock \
-backend-config=unlock_address=${TF_ADDRESS}/lock \
-backend-config=username=${TF_USERNAME} \
-backend-config=password=${TF_PASSWORD} \
-backend-config=lock_method=POST \
-backend-config=unlock_method=DELETE \
-backend-config=retry_wait_min=5Initializing the backend...
Backend configuration changed!
Terraform has detected that the configuration specified for the backend
has changed. Terraform will now check for existing state in the backends.
Acquiring state lock. This may take a few moments...
Do you want to copy existing state to the new backend?
Pre-existing state was found while migrating the previous "http" backend to the
newly configured "http" backend. No existing state was found in the newly
configured "http" backend. Do you want to copy this state to the new "http"
backend? Enter "yes" to copy and "no" to start with an empty state.
Enter a value: yes
Successfully configured the backend "http"! Terraform will automatically
use this backend unless the backend configuration changes.
Initializing provider plugins...
Terraform has been successfully initialized!
You may now begin working with Terraform. Try running "terraform plan" to see
any changes that are required for your infrastructure. All Terraform commands
should now work.
If you ever set or change modules or backend configuration for Terraform,
rerun this command to reinitialize your working directory. If you forget, other
commands will detect it and remind you to do so if necessary.If you type yes, it will copy your state from the old location to the new
location. You can then go back to running it from within GitLab CI.
Output Terraform Plan information into a merge request
Using the GitLab Terraform Report artifact,
you can expose details from terraform plan runs directly into a merge request widget,
enabling you to see statistics about the resources that Terraform will create,
modify, or destroy.
Let's explore how to configure a GitLab Terraform Report artifact. You can
either use a pre-built image which includes a gitlab-terraform helper as
above, where gitlab-terraform plan-json outputs the required artifact, or you
can configure this manually as follows:
-
For simplicity, let's define a few reusable variables to allow us to refer to these files multiple times:
variables: PLAN: plan.cache PLAN_JSON: plan.json -
Install
jq, a lightweight and flexible command-line JSON processor. -
Create an alias for a specific
jqcommand that parses out the information we want to extract from theterraform planoutput:before_script: - apk --no-cache add jq - alias convert_report="jq -r '([.resource_changes[]?.change.actions?]|flatten)|{\"create\":(map(select(.==\"create\"))|length),\"update\":(map(select(.==\"update\"))|length),\"delete\":(map(select(.==\"delete\"))|length)}'"NOTE: Note: In distributions that use Bash (for example, Ubuntu),
aliasstatements are not expanded in non-interactive mode. If your pipelines fail with the errorconvert_report: command not found, alias expansion can be activated explicitly by adding ashoptcommand to your script:before_script: - shopt -s expand_aliases - alias convert_report="jq -r '([.resource_changes[]?.change.actions?]|flatten)|{\"create\":(map(select(.==\"create\"))|length),\"update\":(map(select(.==\"update\"))|length),\"delete\":(map(select(.==\"delete\"))|length)}'" -
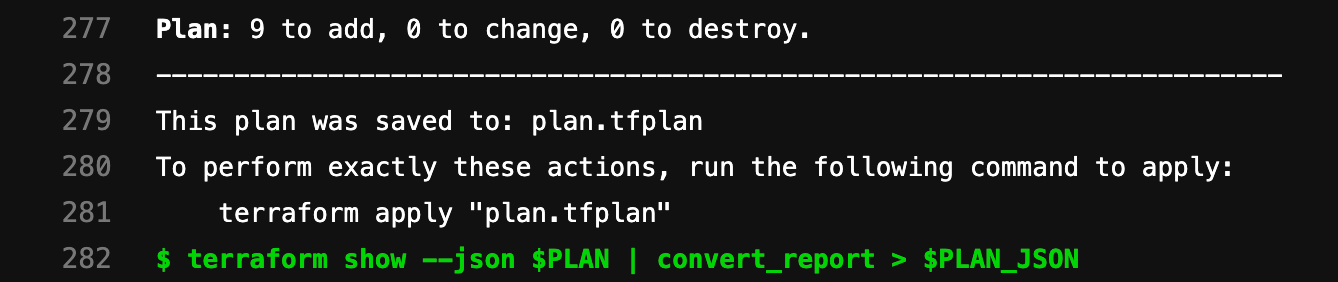
Define a
scriptthat runsterraform planandterraform show. These commands pipe the output and convert the relevant bits into a store variablePLAN_JSON. This JSON is used to create a GitLab Terraform Report artifact. The Terraform report obtains a Terraformtfplan.jsonfile. The collected Terraform plan report is uploaded to GitLab as an artifact, and is shown in merge requests.plan: stage: build script: - terraform plan -out=$PLAN - terraform show --json $PLAN | convert_report > $PLAN_JSON artifacts: reports: terraform: $PLAN_JSONFor a full example using the pre-built image, see Example
.gitlab-ci.yamlfile.For an example displaying multiple reports, see
.gitlab-ci.yamlmultiple reports file. -
Running the pipeline displays the widget in the merge request, like this:

-
Clicking the View Full Log button in the widget takes you directly to the plan output present in the pipeline logs:

Example .gitlab-ci.yaml file
default:
image: registry.gitlab.com/gitlab-org/terraform-images/stable:latest
cache:
key: example-production
paths:
- ${TF_ROOT}/.terraform
variables:
TF_ROOT: ${CI_PROJECT_DIR}/environments/example/production
TF_ADDRESS: ${CI_API_V4_URL}/projects/${CI_PROJECT_ID}/terraform/state/example-production
before_script:
  - cd ${TF_ROOT}

stages:
  - prepare
  - validate
  - build
  - deploy

init:
  stage: prepare
  script:
    - gitlab-terraform init

validate:
  stage: validate
  script:
    - gitlab-terraform validate

plan:
  stage: build
  script:
    - gitlab-terraform plan
    - gitlab-terraform plan-json
  artifacts:
    name: plan
    paths:
      - ${TF_ROOT}/plan.cache
    reports:
      terraform: ${TF_ROOT}/plan.json

apply:
  stage: deploy
  environment:
    name: production
  script:
    - gitlab-terraform apply
  dependencies:
    - plan
  when: manual
  only:
- masterMultiple Terraform Plan reports
Starting with 13.2, you can display multiple reports on the Merge Request page. The reports will also display the artifacts: name:. See example below for a suggested setup.
default:
  image:
    name: registry.gitlab.com/gitlab-org/gitlab-build-images:terraform
    entrypoint:
      - '/usr/bin/env'
      - 'PATH=/usr/local/sbin:/usr/local/bin:/usr/sbin:/usr/bin:/sbin:/bin'

  cache:
    paths:
      - .terraform

stages:
  - build

.terraform-plan-generation:
  stage: build
  variables:
    PLAN: plan.tfplan
    JSON_PLAN_FILE: tfplan.json
  before_script:
    - cd ${TERRAFORM_DIRECTORY}
    - terraform --version
    - terraform init
    - apk --no-cache add jq
  script:
    - terraform validate
    - terraform plan -out=${PLAN}
    - terraform show --json ${PLAN} | jq -r '([.resource_changes[]?.change.actions?]|flatten)|{"create":(map(select(.=="create"))|length),"update":(map(select(.=="update"))|length),"delete":(map(select(.=="delete"))|length)}' > ${JSON_PLAN_FILE}
  artifacts:
    reports:
      terraform: ${TERRAFORM_DIRECTORY}/${JSON_PLAN_FILE}

review_plan:
  extends: .terraform-plan-generation
  variables:
    TERRAFORM_DIRECTORY: "review/"
  # Review will not include an artifact name

staging_plan:
  extends: .terraform-plan-generation
  variables:
    TERRAFORM_DIRECTORY: "staging/"
  artifacts:
    name: Staging

production_plan:
  extends: .terraform-plan-generation
  variables:
    TERRAFORM_DIRECTORY: "production/"
  artifacts:
    name: Production
Using a GitLab managed Terraform state backend as a remote data source
You can use a GitLab-managed Terraform state as a Terraform data source. To use your existing Terraform state backend as a data source, provide the following details as Terraform input variables:
-
address: The URL of the remote state backend you want to use as a data source.
For example,
https://gitlab.com/api/v4/projects/<TARGET-PROJECT-ID>/terraform/state/<TARGET-STATE-NAME>. -
username: The username to authenticate with the data source. If you are using a Personal Access Token for
authentication, this is your GitLab username. If you are using GitLab CI, this is
'gitlab-ci-token'. -
password: The password to authenticate with the data source. If you are using a Personal Access Token for
authentication, this is the token value. If you are using GitLab CI, it is the contents of the
${CI_JOB_TOKEN}CI variable.
An example setup is shown below:
-
Create a file named
example.auto.tfvarswith the following contents:example_remote_state_address=https://gitlab.com/api/v4/projects/<TARGET-PROJECT-ID>/terraform/state/<TARGET-STATE-NAME> example_username=<GitLab username> example_access_token=<GitLab Personal Acceess Token> -
Define the data source by adding the following code block in a
.tffile (such asdata.tf):data "terraform_remote_state" "example" { backend = "http" config = { address = var.example_remote_state_address username = var.example_username password = var.example_access_token } }
Outputs from the data source can now be referenced within your Terraform resources
using data.terraform_remote_state.example.outputs.<OUTPUT-NAME>.
You need at least developer access to the target project to read the Terraform state.